Master Easy Chocolate Covered Strawberries: Quality & Melting Guide
Few desserts combine elegance, simplicity, and irresistible flavor quite like chocolate covered strawberries. These glistening, jewel-toned delights often grace dessert tables at upscale events, yet their creation is surprisingly straightforward, taking mere minutes from start to finish. Far from a culinary challenge, making your own at home is not only cost-effective but also guarantees a level of freshness and quality that store-bought versions simply can't match. This comprehensive guide will walk you through the essentials, focusing on the critical roles of ingredient quality and mastering the art of melting chocolate, ensuring your homemade treats are nothing short of spectacular.
The Foundation of Flavor: Quality Ingredients Matter
When a recipe boasts only two main components, the quality of each becomes paramount. This is especially true for chocolate covered strawberries, where the interplay of fresh fruit and rich chocolate creates a truly memorable experience.
Selecting the Perfect Strawberries
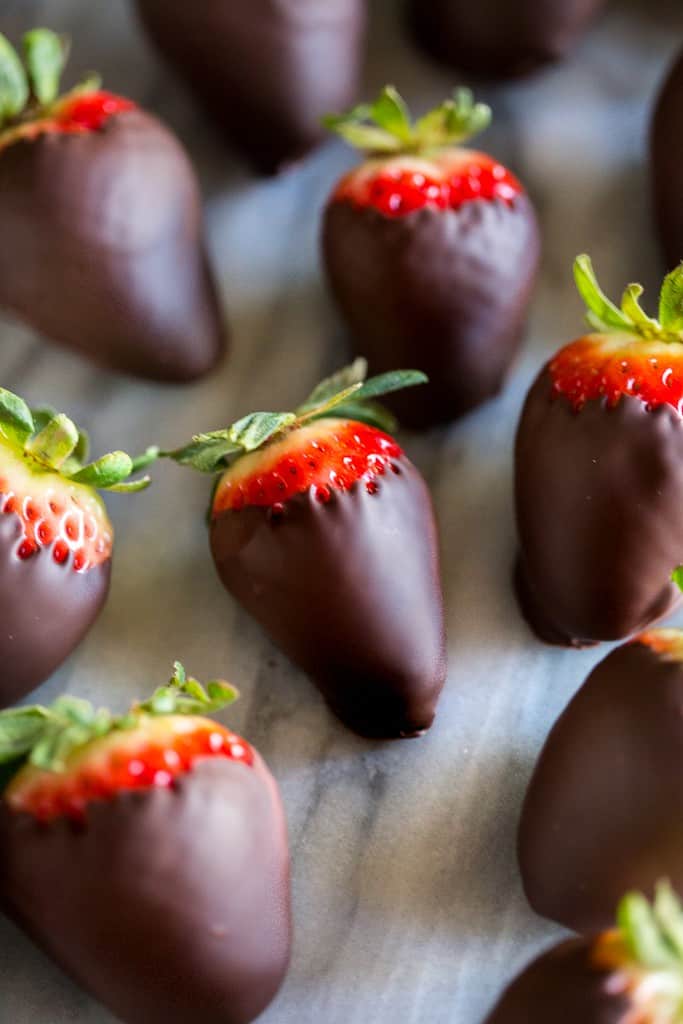
The journey to perfect chocolate covered strawberries begins with choosing the right fruit. Opt for firm, ripe strawberries that are a vibrant red all the way up to their green stems. Avoid any with bruises, soft spots, or a pale hue, as these will compromise both taste and texture. Ideally, select berries that are medium to large in size, as they provide a satisfying bite and are easier to dip.
Before dipping, proper preparation of your strawberries is absolutely crucial. Wash them gently under cool water, leaving the stems intact. The most critical step follows: *drying*. Using paper towels, gently but thoroughly pat each strawberry completely dry. Any residual moisture will cause the chocolate to seize or refuse to adhere properly, resulting in a patchy, uneven coat. For optimal results, bring your cleaned and dried strawberries to room temperature by letting them sit out for 15-30 minutes before dipping. This helps prevent the chocolate from cracking due to temperature shock and ensures a smoother, more uniform coating.
Choosing the Right Chocolate for Dipping
While it might be tempting to grab any bag of chocolate chips, the type of chocolate you use will significantly impact both the taste and the melting process. For truly professional-looking and tasting chocolate covered strawberries, invest in high-quality baking chocolate or baking chocolate chips.
Here’s why quality matters:
- Superior Taste: High-quality chocolate tastes less processed, offering a richer, more nuanced flavor profile that truly complements the sweetness of the strawberries.
- Effortless Melting: Baking chocolate is formulated to melt smoothly and evenly, creating a consistent, pourable consistency perfect for dipping. Cheaper chocolate chips often contain stabilizers that make them resist melting into a silky texture, leading to clumpy, hard-to-work-with chocolate.
- Flawless Coating: A well-melted, high-quality chocolate will create a beautiful, even, and glossy coat on your strawberries. It sets beautifully, providing that satisfying snap when bitten.
Consider using semi-sweet, dark, milk, or even white chocolate, depending on your preference. For an extra touch of perfection that prevents the chocolate from cracking or sliding off when bitten, consider adding a tiny touch of neutral oil (like coconut oil or vegetable oil) to your melting chocolate. This creates a slightly softer, more pliable finish, a secret many professional chocolatiers swear by. This simple addition elevates these already impressive treats into the
impressive 3-ingredient dessert category!
Mastering the Melt: Techniques for Silky Smooth Chocolate
Achieving that perfectly smooth, glossy chocolate coating hinges on proper melting. There are two primary, easy methods for melting chocolate at home: the double boiler and the microwave.
The Double Boiler Method
This classic technique offers gentle, even heating, minimizing the risk of burning the chocolate. If you don't own a traditional double boiler, you can easily create your own:
- Fill a saucepan with about an inch or two of water.
- Place a heat-safe glass or metal bowl on top of the saucepan, ensuring the bottom of the bowl does not touch the water.
- Bring the water to a gentle simmer over medium-low heat.
- Add your chopped baking chocolate or high-quality chocolate chips to the bowl.
- Stir continuously with a rubber spatula as the chocolate melts, until it is completely smooth and free of lumps. Avoid getting any water into the chocolate, as this will cause it to seize and become grainy.
- Once melted, remove the bowl from the heat but leave it over the warm (not hot) water to keep the chocolate in a fluid state while you dip.
Microwave Melting for Convenience
For a quicker approach, the microwave is a viable option, *provided you use high-quality baking chocolate chips*. Cheap chips are more prone to scorching or seizing in the microwave.
- Place your chocolate in a microwave-safe bowl.
- Microwave on medium power (around 50%) in 30-second intervals, stirring thoroughly after each interval.
- Continue microwaving and stirring until the chocolate is mostly melted, with just a few small lumps remaining.
- Remove from the microwave and continue stirring until the residual heat melts the remaining lumps and the chocolate is completely smooth and fluid. This prevents overheating.
Never rush the microwave melting process by using high power or long intervals, as chocolate burns easily and becomes unusable. Low and slow is the key.
Dipping, Decorating, and Displaying Your Masterpieces
With your perfectly prepped strawberries and silky smooth chocolate, it's time for the fun part: dipping!
The Art of Dipping
Holding a strawberry by its stem, dip it into the melted chocolate, twirling gently to ensure an even coating. Allow any excess chocolate to drip back into the bowl. For a cleaner look, you can lightly scrape the bottom of the strawberry against the rim of the bowl. Place the dipped strawberries on a baking sheet lined with parchment paper or wax paper.
Creative Topping Ideas
This is where you can truly personalize your chocolate covered strawberries. While the classic chocolate coating is delicious on its own, adding toppings can elevate their visual appeal and flavor profile. Immediately after dipping (before the chocolate sets), sprinkle with:
- Chopped nuts (pecans, almonds, pistachios)
- Rainbow or chocolate sprinkles
- Shredded coconut
- Crushed cookies or Graham crackers
- A contrasting chocolate drizzle (e.g., white chocolate drizzle over dark chocolate, or vice versa)
For drizzling, melt a small amount of contrasting chocolate (either in a separate double boiler setup or microwave) and transfer it to a piping bag with a very small snip at the end, or use a spoon to create thin lines over the set chocolate.
Optimal Storage for Freshness and Flavor
Chocolate covered strawberries are a delicate treat, and proper storage is essential to maintain their quality and prevent spoilage. These beauties are truly best enjoyed the same day they are made.
Once dipped and decorated, allow the chocolate to fully set at room temperature or in the refrigerator for about 15-20 minutes. Then, if serving the same day, store them uncovered on your counter, away from direct sunlight or heat, to prevent sweating.
If you must store them for a short period, you may place them uncovered in the refrigerator for up to one day, ideally on the same parchment-lined baking sheet. Storing them uncovered helps prevent condensation from forming on the chocolate. However, be aware that refrigeration can sometimes cause the chocolate to lose some of its sheen and the strawberries to eventually "sweat."
Crucially, please do NOT freeze chocolate covered strawberries. While freezing seems like a convenient way to extend shelf life, it will completely ruin their delicate texture. As the strawberries thaw, they release moisture, which will cause the chocolate coating to become soft, sticky, and visually unappealing. The fruit itself will also become mushy.
For maximum freshness and optimal taste, aim to enjoy your homemade chocolate covered strawberries within 1 to 2 days maximum. Beyond this, the strawberries will start to release moisture, causing the chocolate to sweat and potentially compromising the texture of the fruit. For more detailed insights on maintaining peak quality, consult our guide on
Chocolate Covered Strawberries: Essential Tips for Quality & Storage. Remember, these elegant bites are not just a dessert; they're an experience best savored fresh!
Conclusion
Making your own chocolate covered strawberries is a rewarding culinary endeavor that proves impressive results don't always require complex techniques. By focusing on high-quality ingredients – perfectly ripe, dry strawberries and superior baking chocolate – and mastering simple melting methods, you can create a dessert that rivals any gourmet confectioner. Whether for a special occasion, a thoughtful gift, or a personal indulgence, these easy-to-make, bite-sized delights offer a burst of fresh flavor and rich chocolate that truly tastes better from scratch. So go ahead, dip into this delightful dessert and impress yourself and your loved ones with your newfound skills!